

Continuing our introductory series covering ingesting logs into Q:CYBER and using our streaming rules engine in this post we cover how to create a detection rule using one of the many templates included in the platform.
In part 1 we covered how to configure NXLog to forward Windows Event Logs (WEL) into Q:CYBER. In part 2 we described in more detail how our streaming rules engine works. In part 3, we reviewed how to create simple rules using the Q:CYBER Rules Builder.
In this post, we’ll build on that foundation to create a detection for Pass-the-Hash attacks based on Windows Event Logs.
Using Templates
The obvious first step to writing a detection is to identify what exactly you want to be alerted on. To make this easier, Q:CYBER comes with a library of rule templates to get you started.
As an example let’s focus on a very well known attack technique, Pass-the-Hash (PtH). Pass-the-Hash attacks take advantage of a fundamental limitation in the NTLM protocol that enables attackers to capture password hashes stored in memory and re-use them to access other network resources. More details on this attack is covered in our QOMPLX Knowledge series.
The only way to fully prevent PtH attacks in Active Directory is to disable NTLM. Unfortunately, this is a long-term effort and usually not an expedient or low-cost option in large enterprises because of legacy applications that rely on NTLM for authentication. If you can’t disable NTLM it’s important to be able to detect when attackers are leveraging this protocol to their advantage. One way to begin detecting potential PtH attacks is by monitoring Windows Event ID 4624. According Microsoft documentation, this alert is generated when “an account was successfully logged on.”
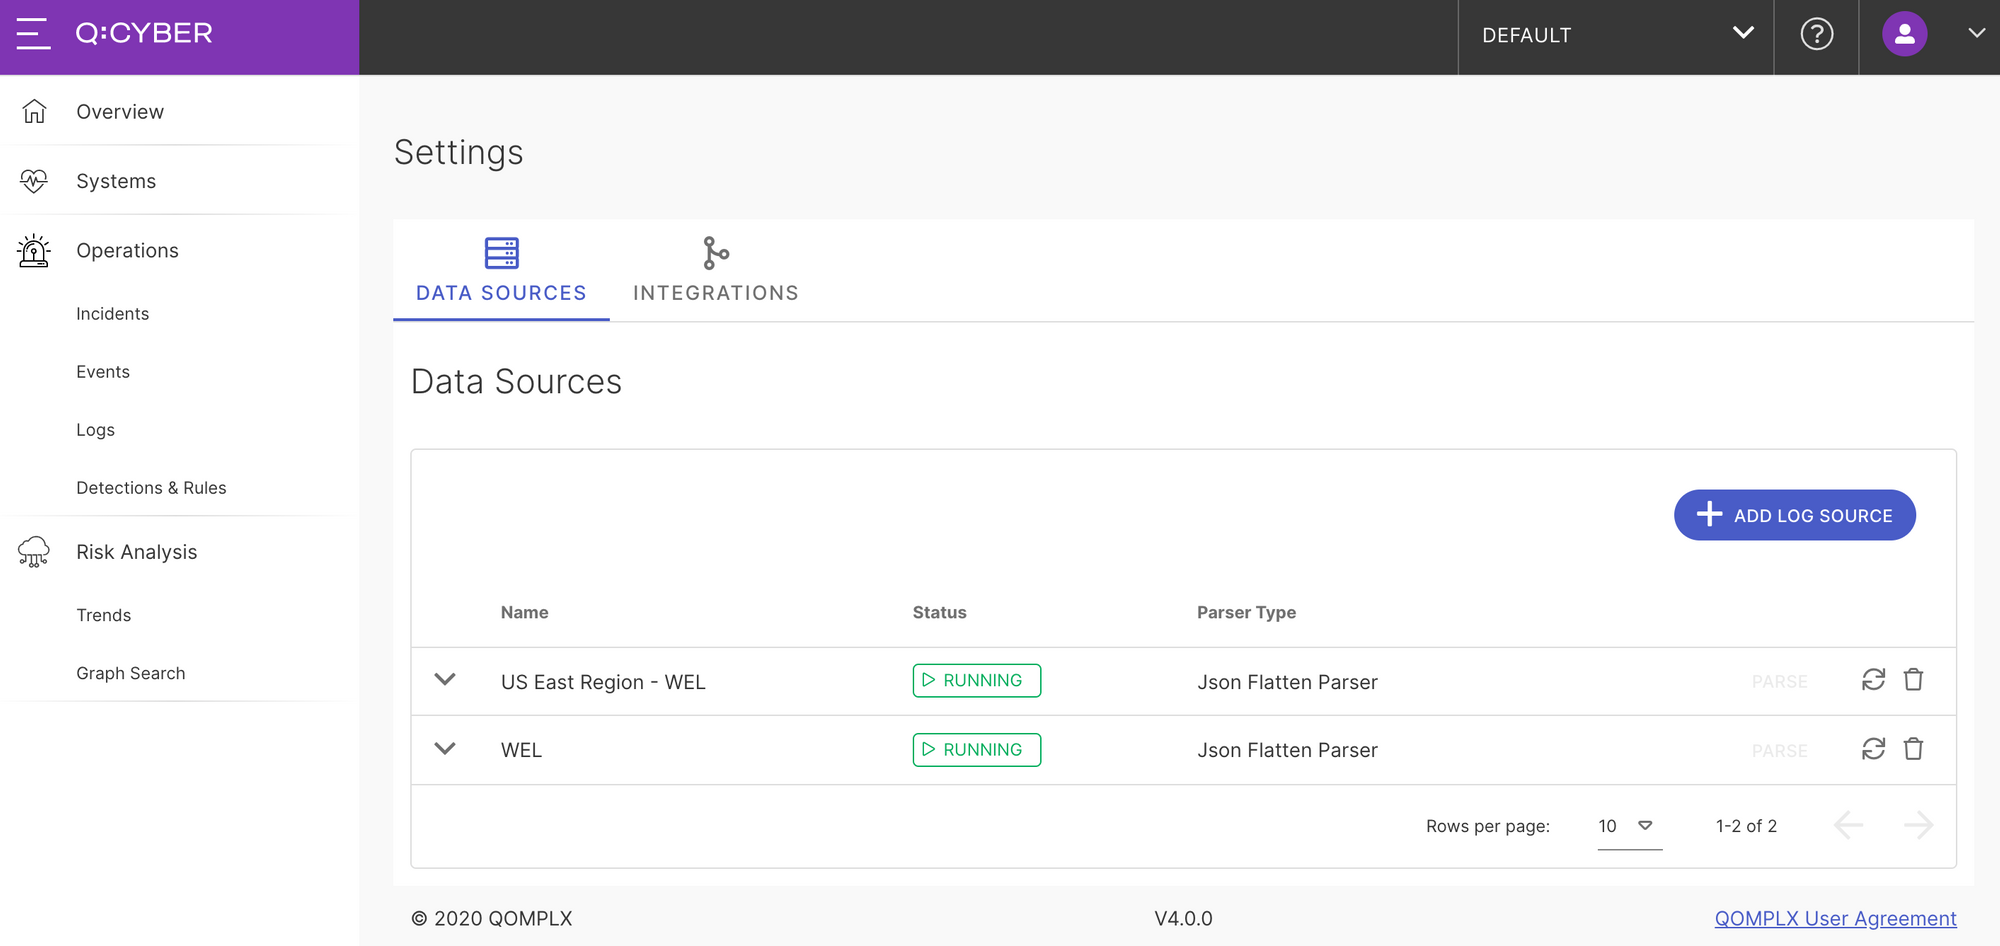
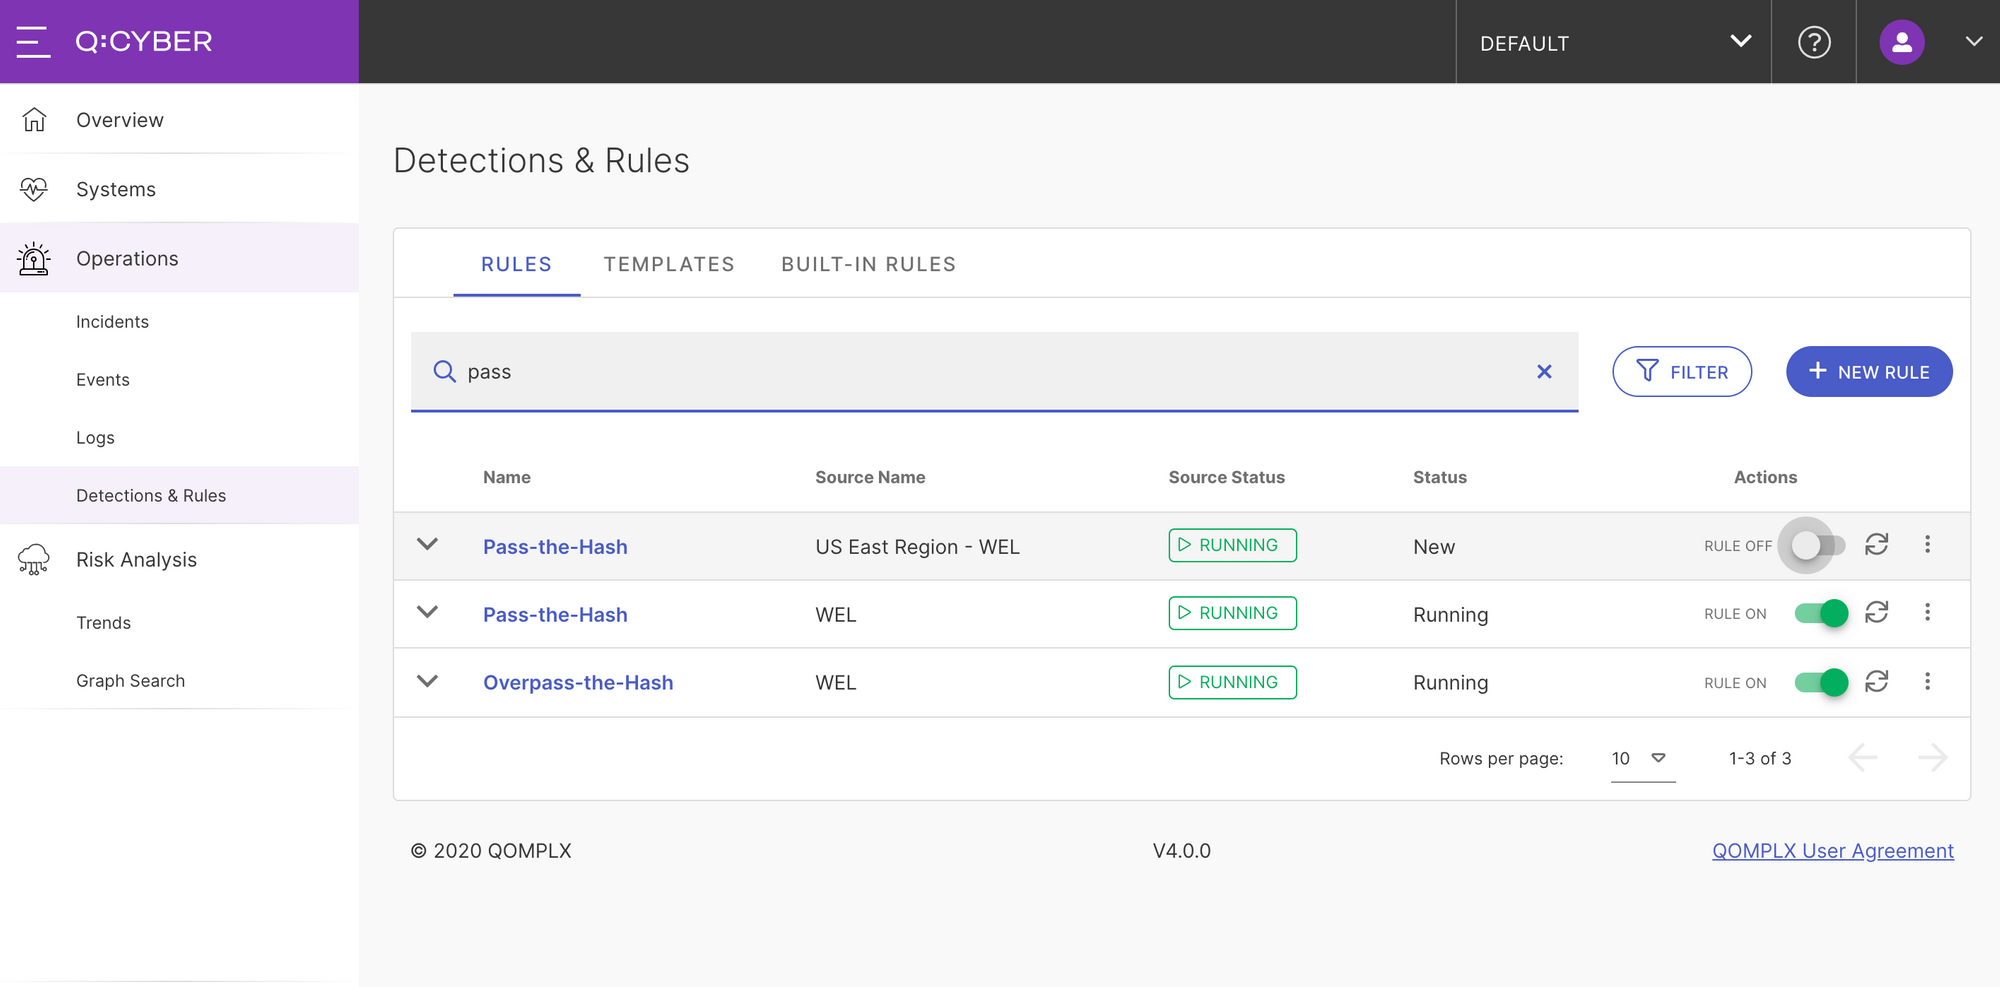
Recall that in Part 1 we created a new log source called US East Region - WEL and forwarded Windows Event Logs to Q:CYBER using the utility NXLog (Figure 1).
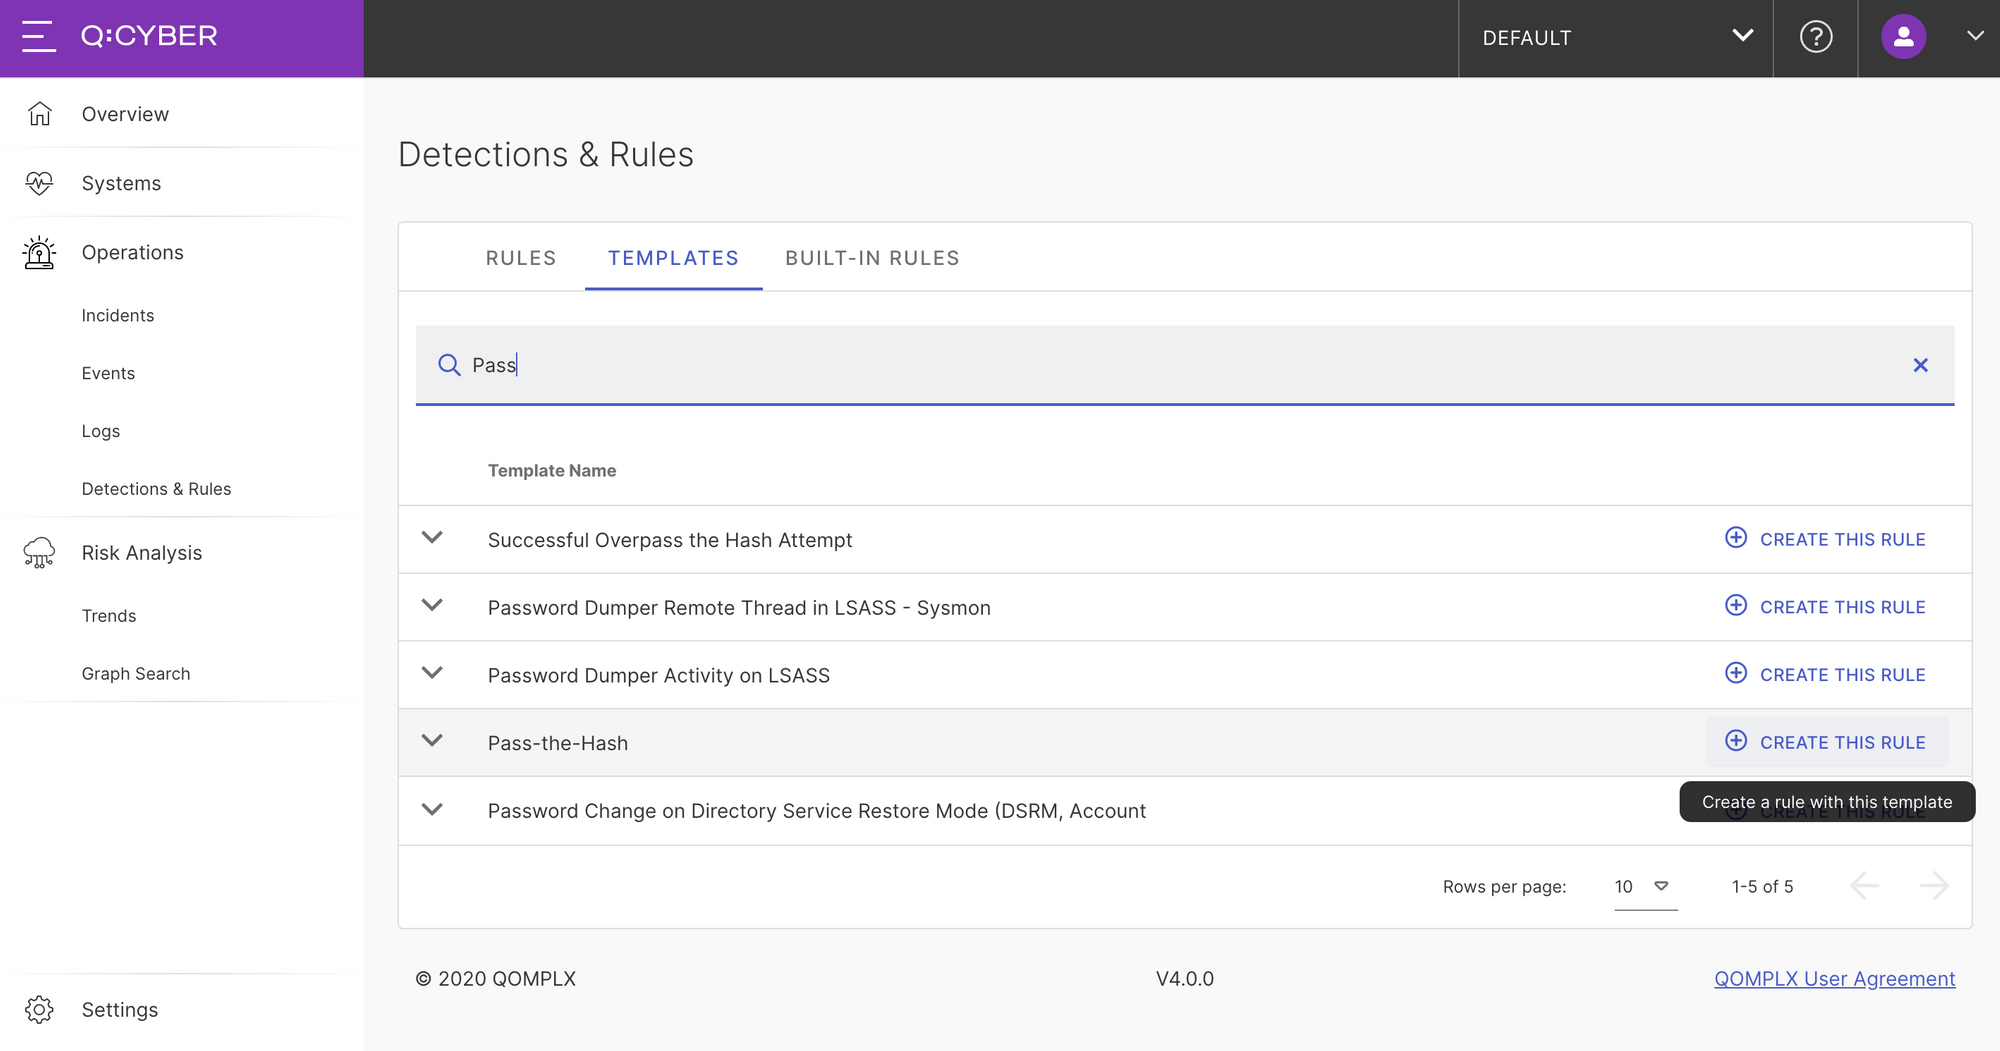
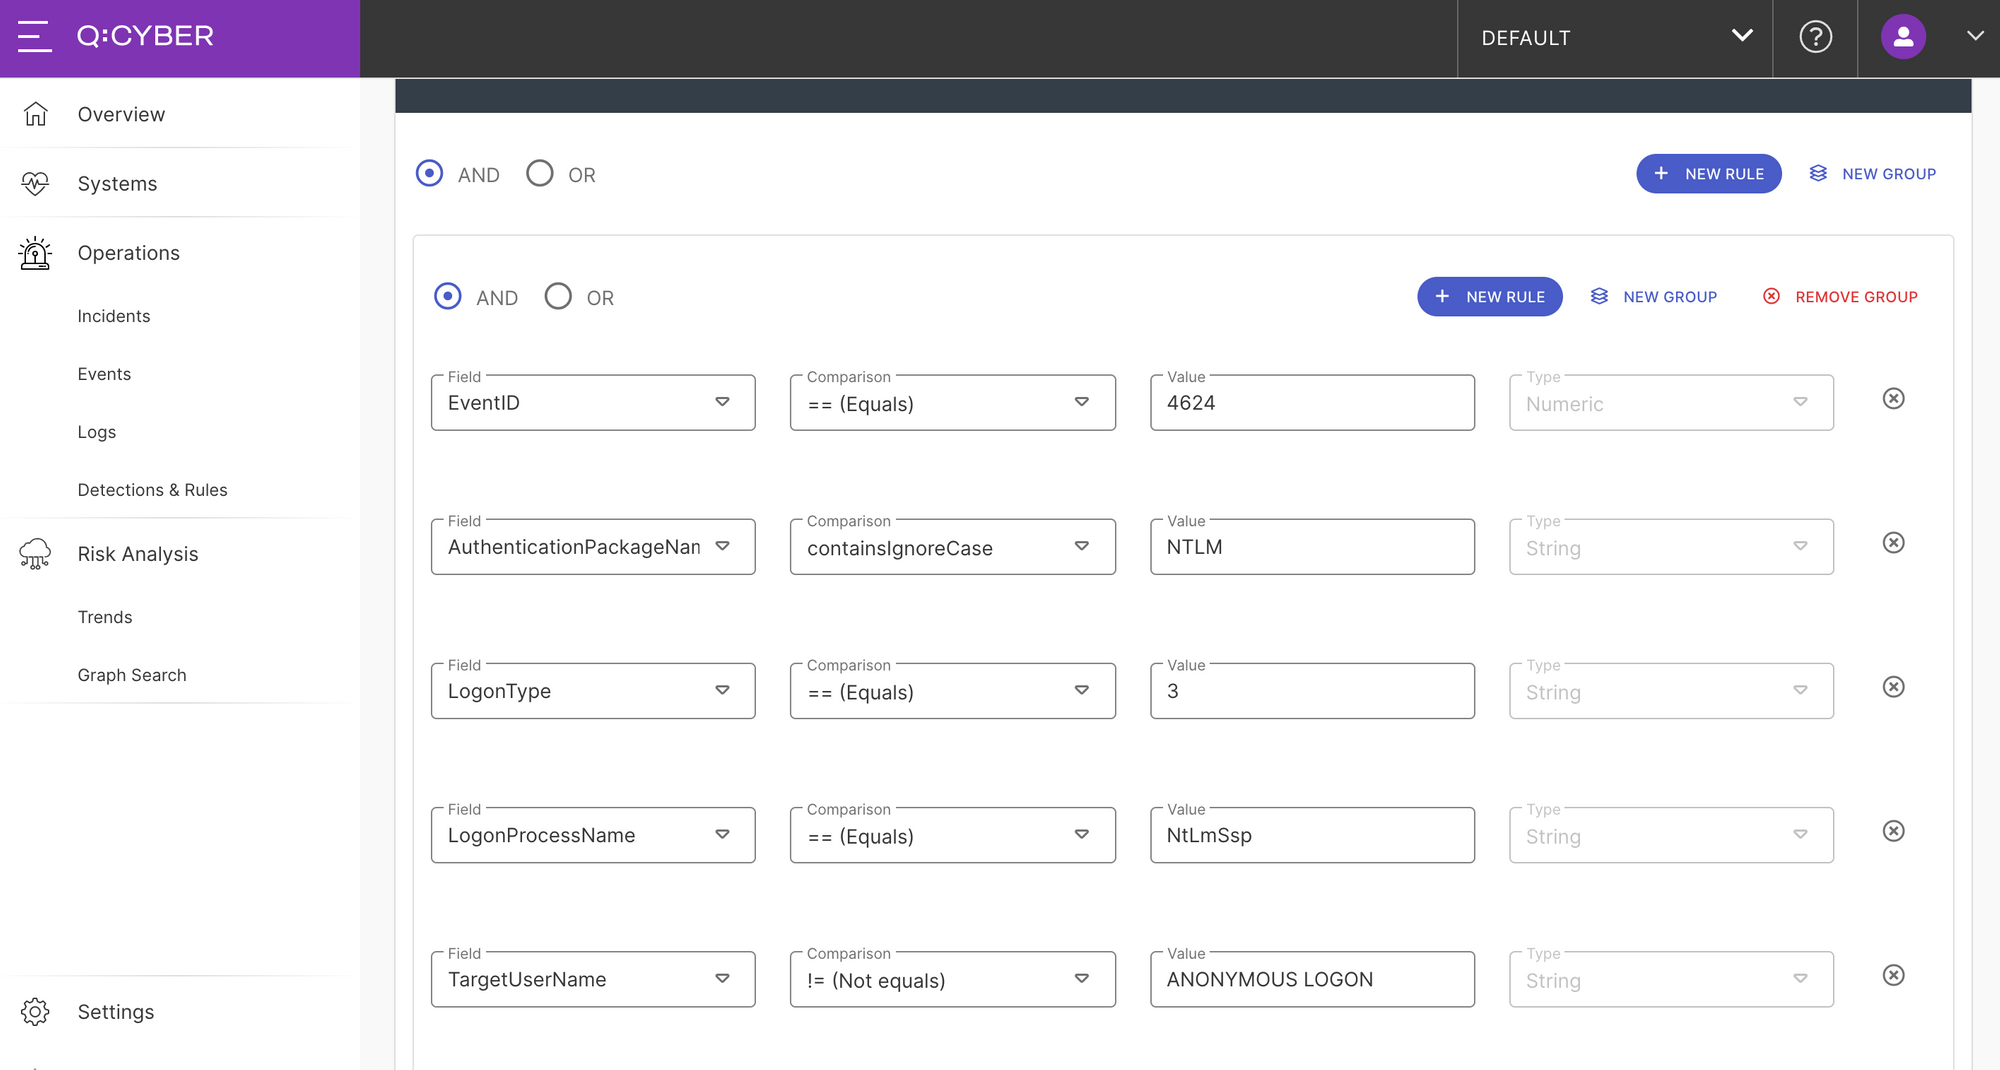
Building on this we can now quickly enable a rule to detect PtH attacks. First, navigate to the Templates tab in the Detection and Rules section of Q:CYBER, and enter the search phrase Pass into the search bar. You’ll see a list of results including a template for Pass-the-Hash. Next click on Create This Rule to jump into the rules builder.
Notice that by selecting a template nearly every option is pre-populated for you except for the data source. When building a rule you will be alerted to select which data source to evaluate against. By selecting US East Region - WEL in this example the rules builder will automatically populate the dropdown fields using the parsed information from the raw logs.
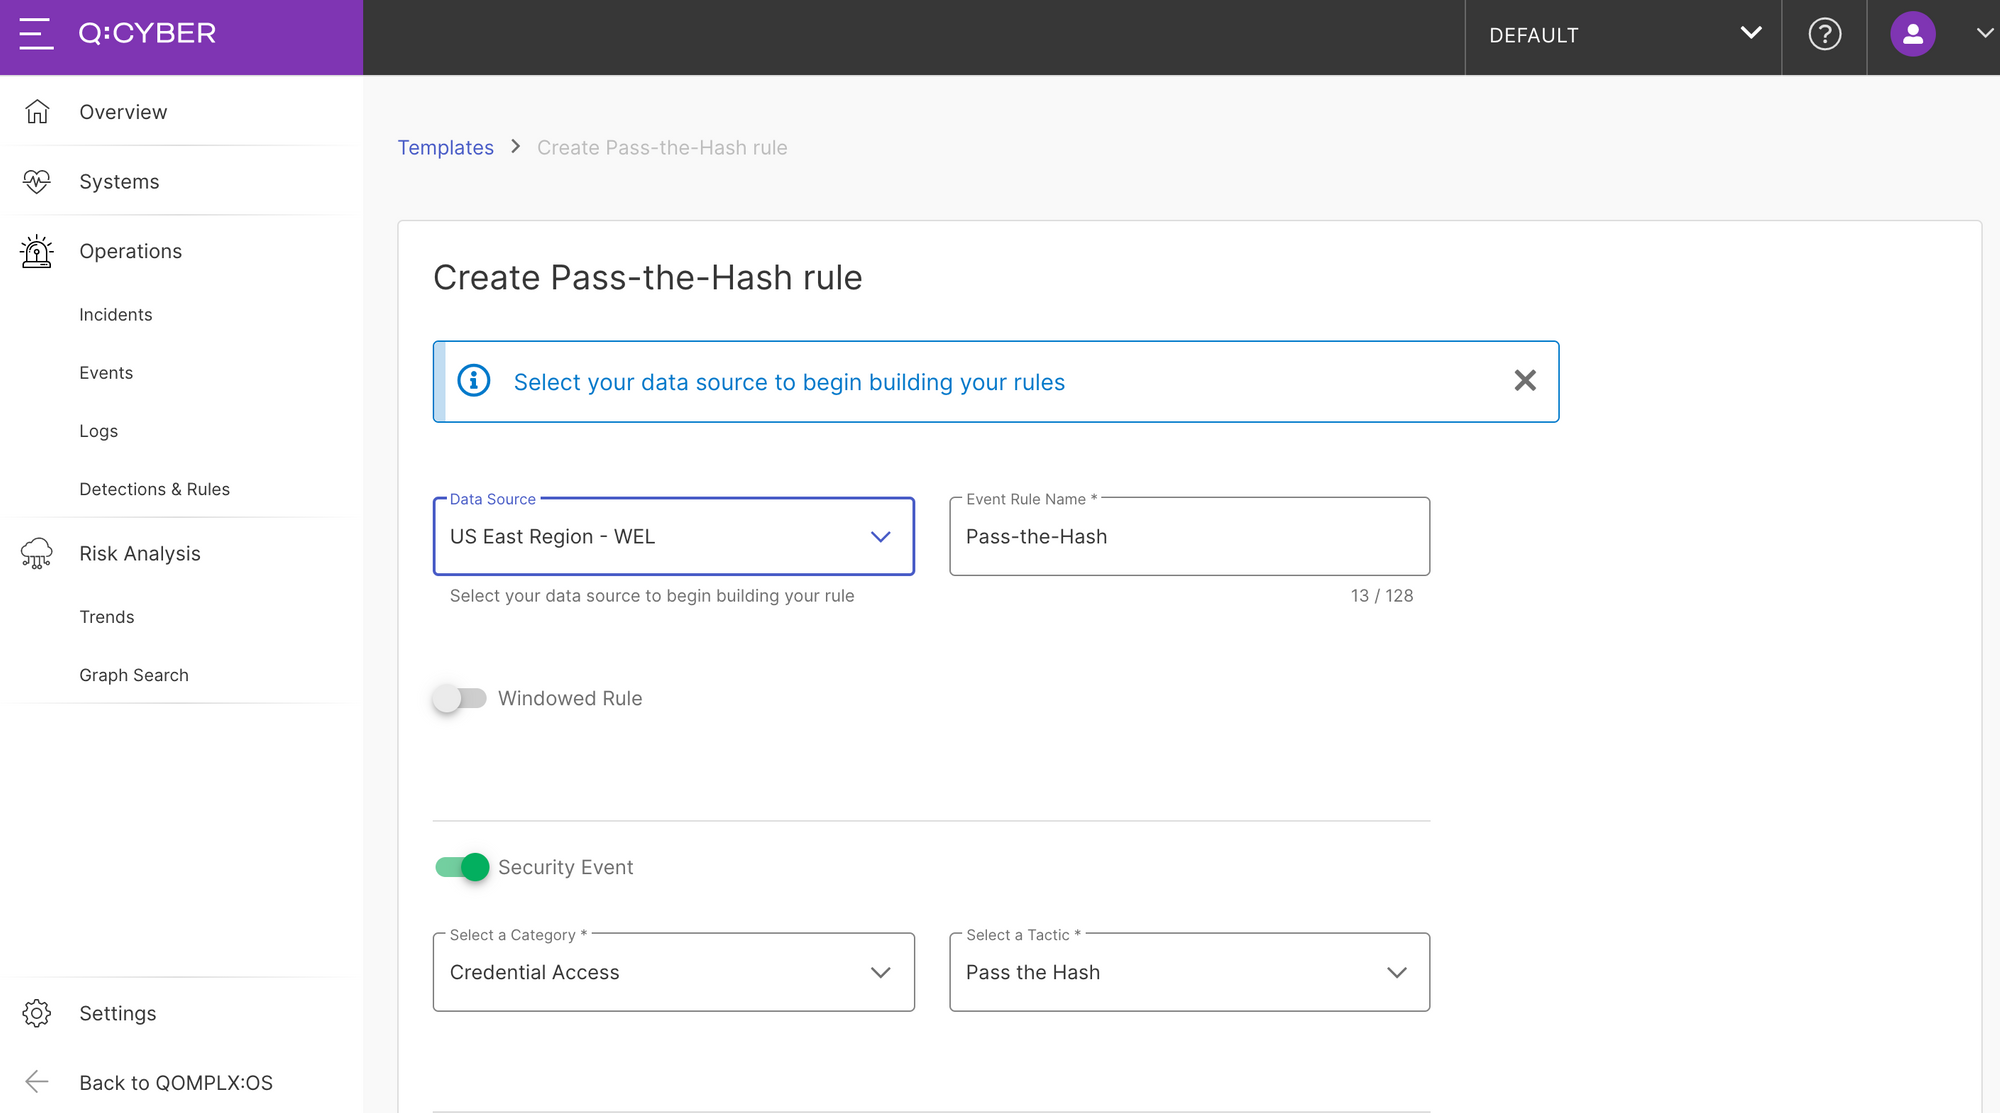
Since this is a template it is fully customizable and you can change anything to suit your specific needs including the name, metadata, conditional logic, and alert description. In Figure 3, you’ll notice several options including windowed rules which will be covered in the next post.
Rule Tagging & Metadata
The next option is to select whether this rule should generate a security event. Switching security event option "on" allows you to tag the rule with tactics and techniques from the MITRE ATT&CK framework and other categories; it also means an event will be generated and displayed in the queue.
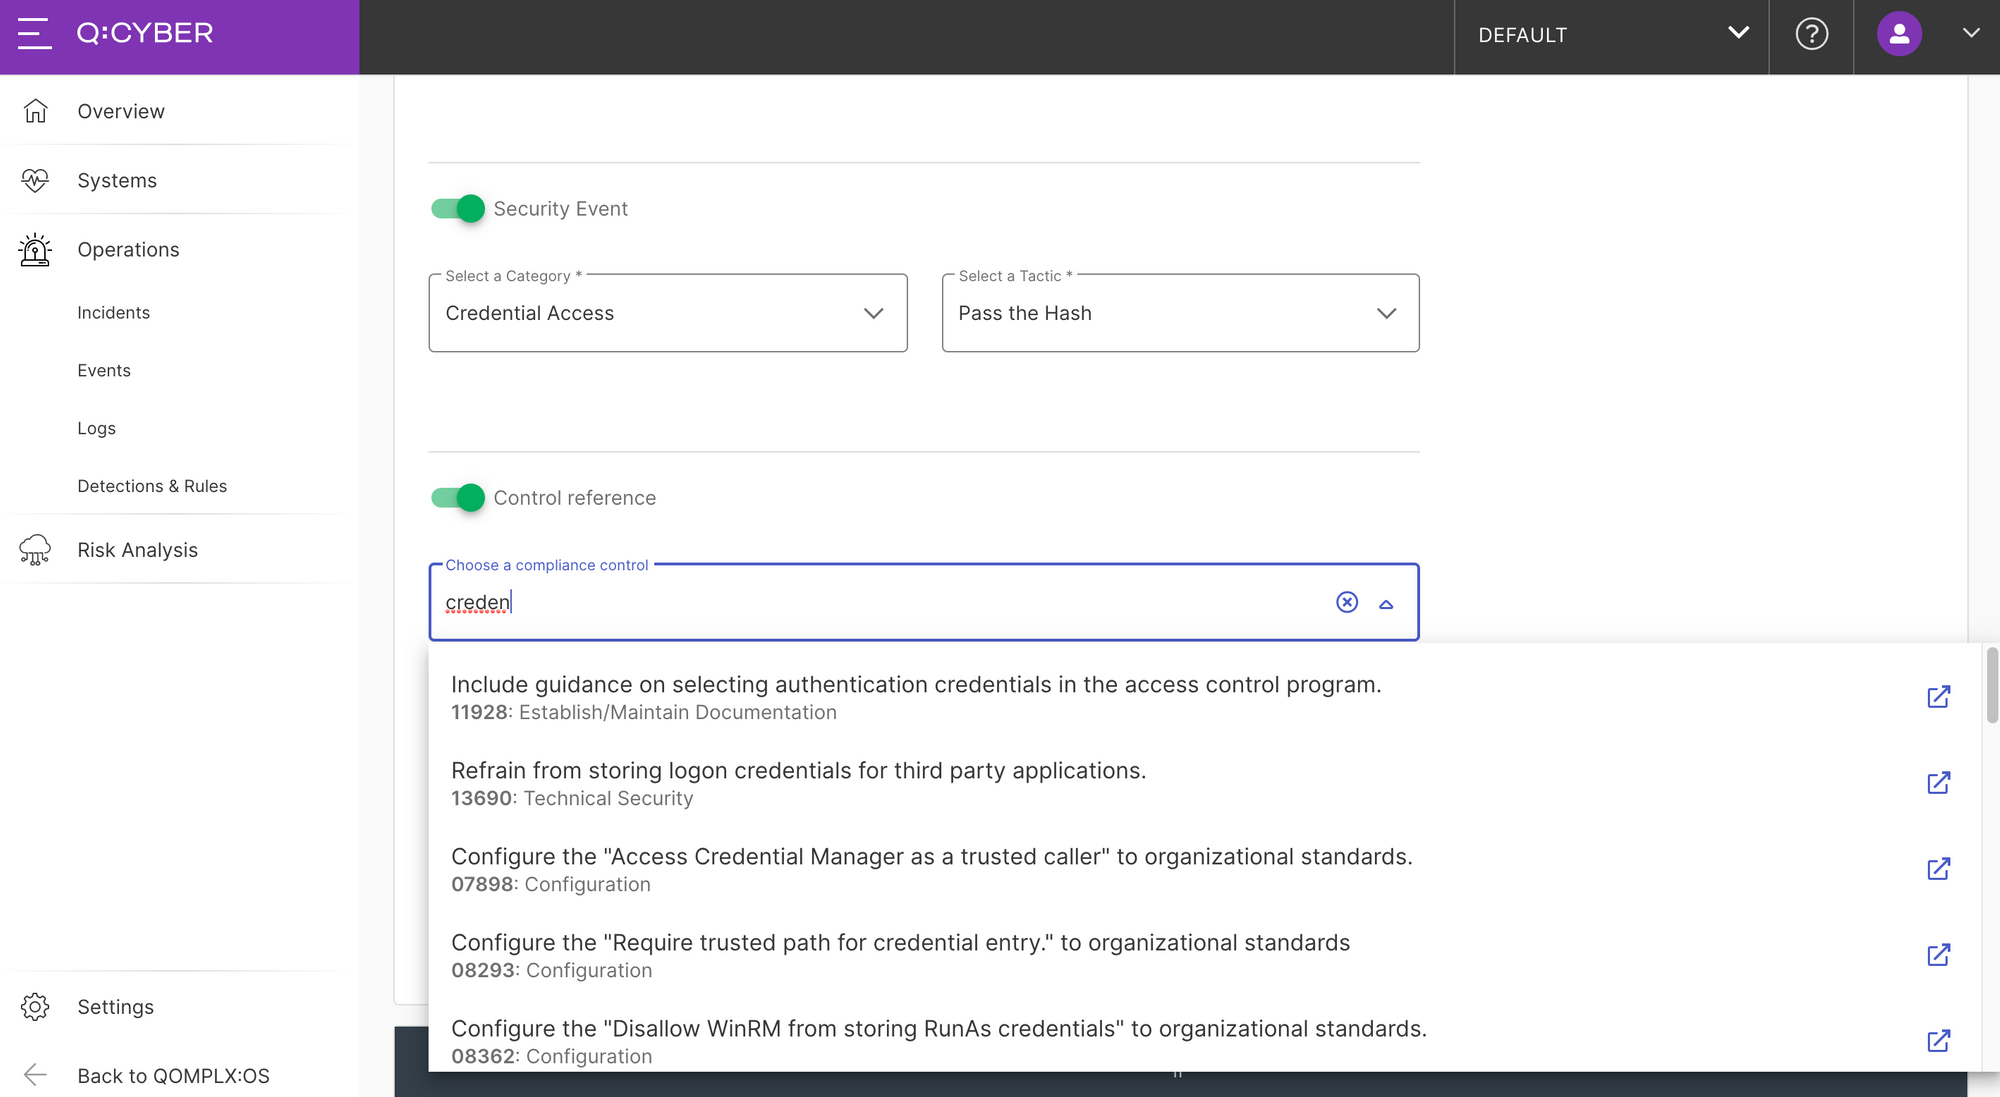
Next you can optionally select control reference tags from the Unified Compliance Framework to help with tracking compliance activities by linking rules to specific control efforts.
Conditions
The heart of every rule is the logical conditions and all the details of our templates are available in full view so you can decide for yourself if it does what you want. As you can see below by selecting a template all conditions needed to detect a PtH attack are pre populated. Our team is constantly evaluating and developing rule templates. Some are adopted from best practices and recommendations from the security community, and others are developed in-house by our team.
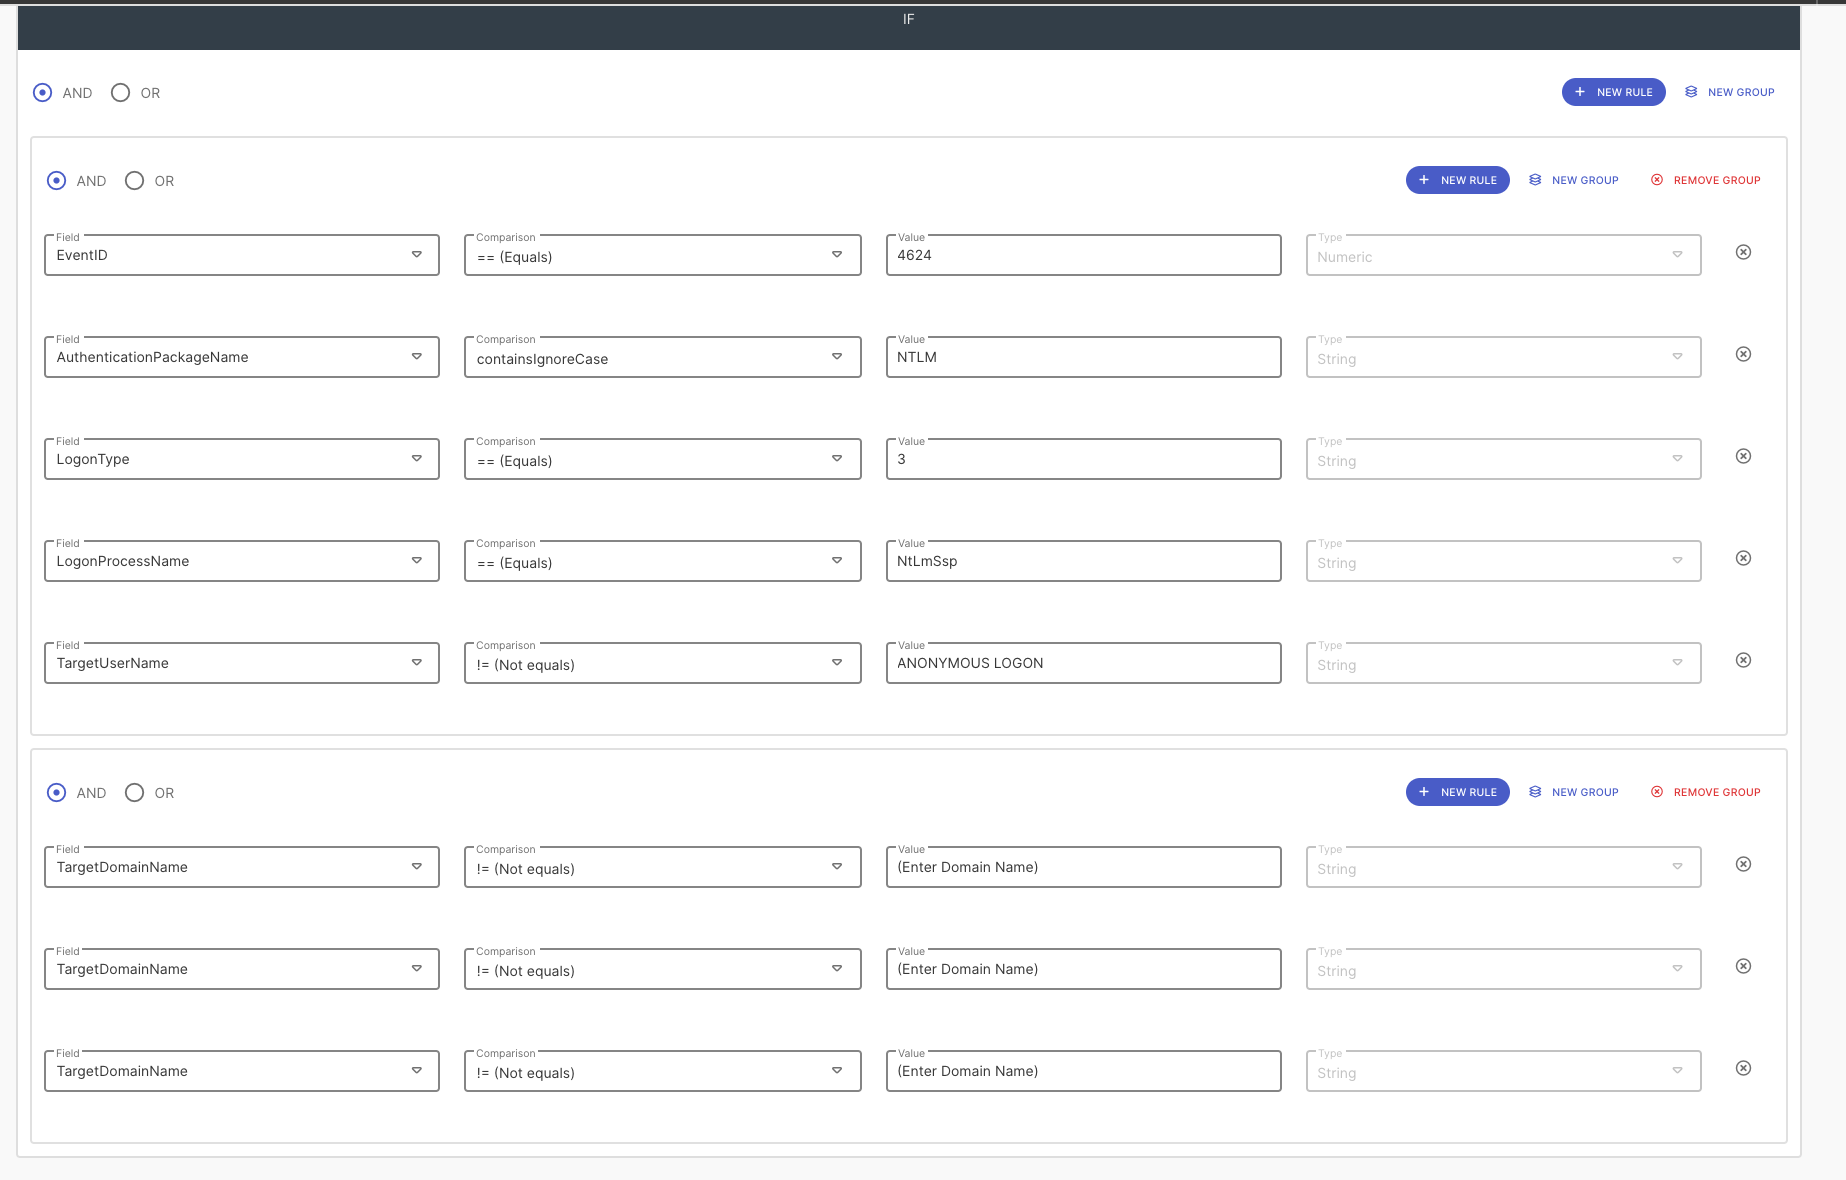
One important thing to notice is that this rule requires some environmental specific values to minimize the false positive rate. Event 4624 is very common so it’s important to construct a rule that will filter out the versions of 4624 events that we don’t want. As best practice, we only want to trigger on local accounts and not domain accounts (i.e. domain/user format). We can do that by specifically excluding our domain names in the TargetDomainName condition, as show in Figure 6.
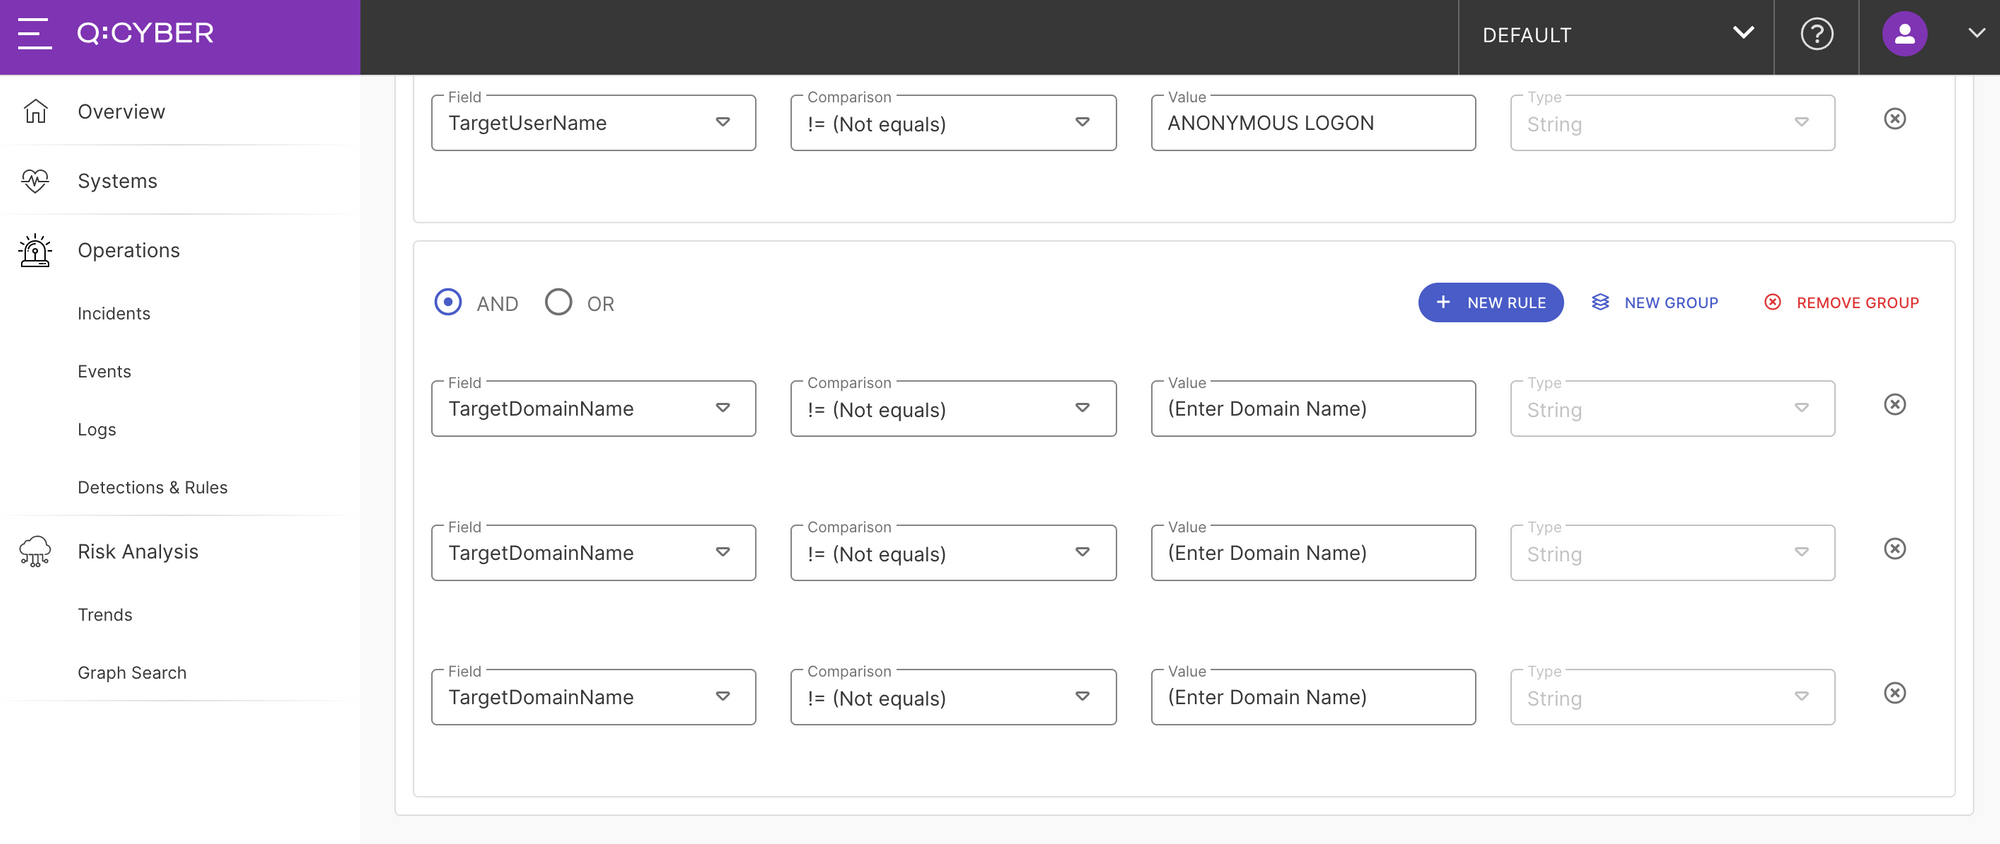
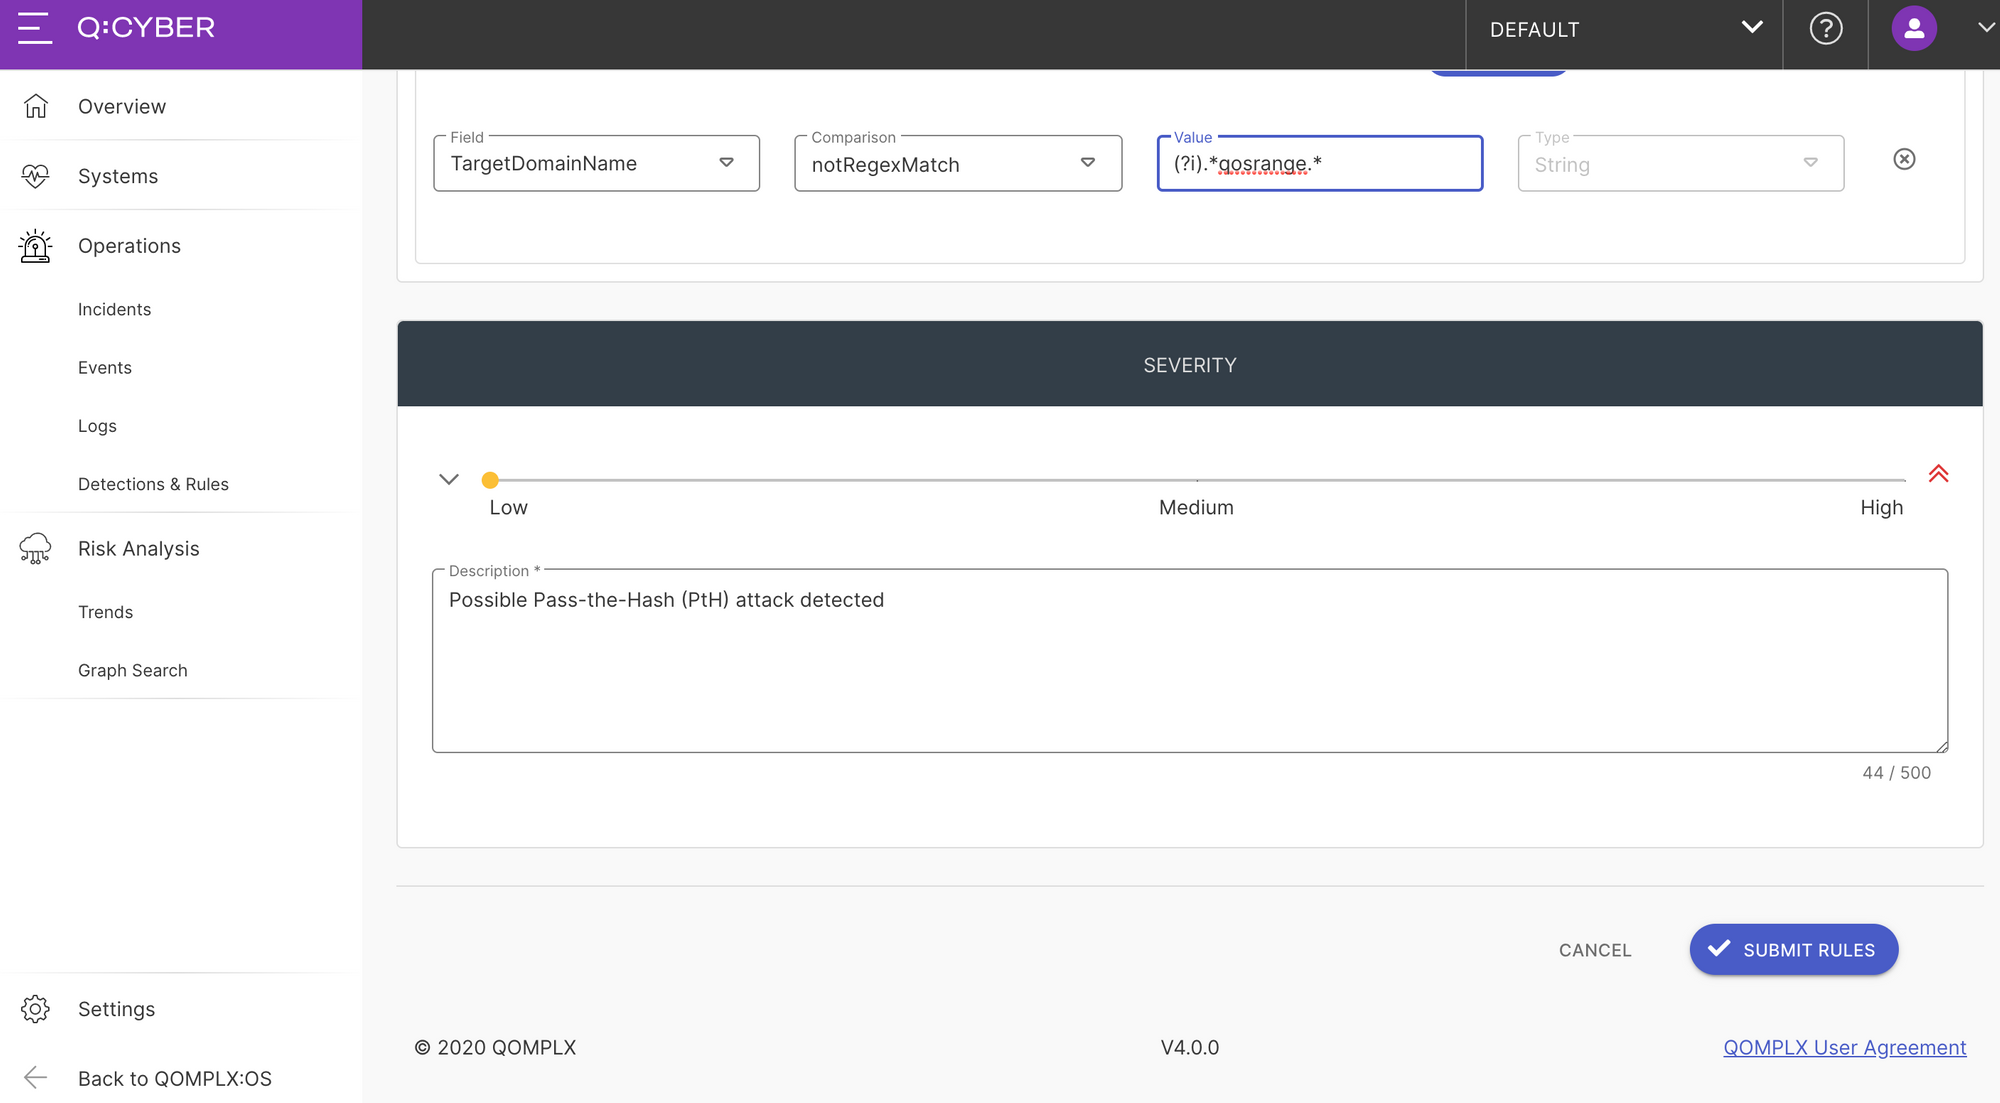
One way to do it is to use the != (Not Equals) comparison operator for each domain that is included in your log stream. Another way is to use the notRegexMatch operator to generally match against a common naming convention as shown below. Either way works so feel free to customize the rule as needed.
As mentioned above you may also adjust the severity if needed and add any additional information in the description, as shown in Figure 8.
Create and Activate the Rule
As a final step click the Submit Rules button and a new PtH rule will appear in the Rules table. Simply toggle the ON/OFF switch to deploy the new rule; Q:CYBER will orchestrate the necessary infrastructure and add the rule to the existing pipeline.
Testing the New Rule
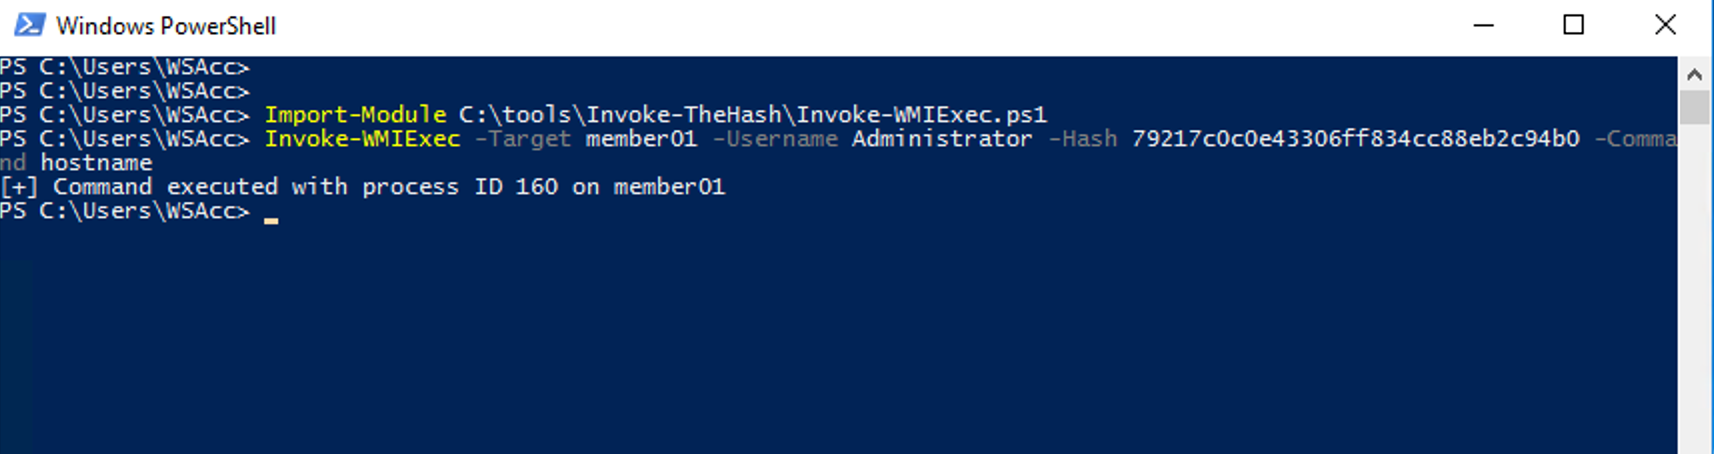
To test the detection we can use commonly available tools such as the Invoke-WMIExec PowerShell module to execute a PtH attack and run a command on a remote system (Figure 10).
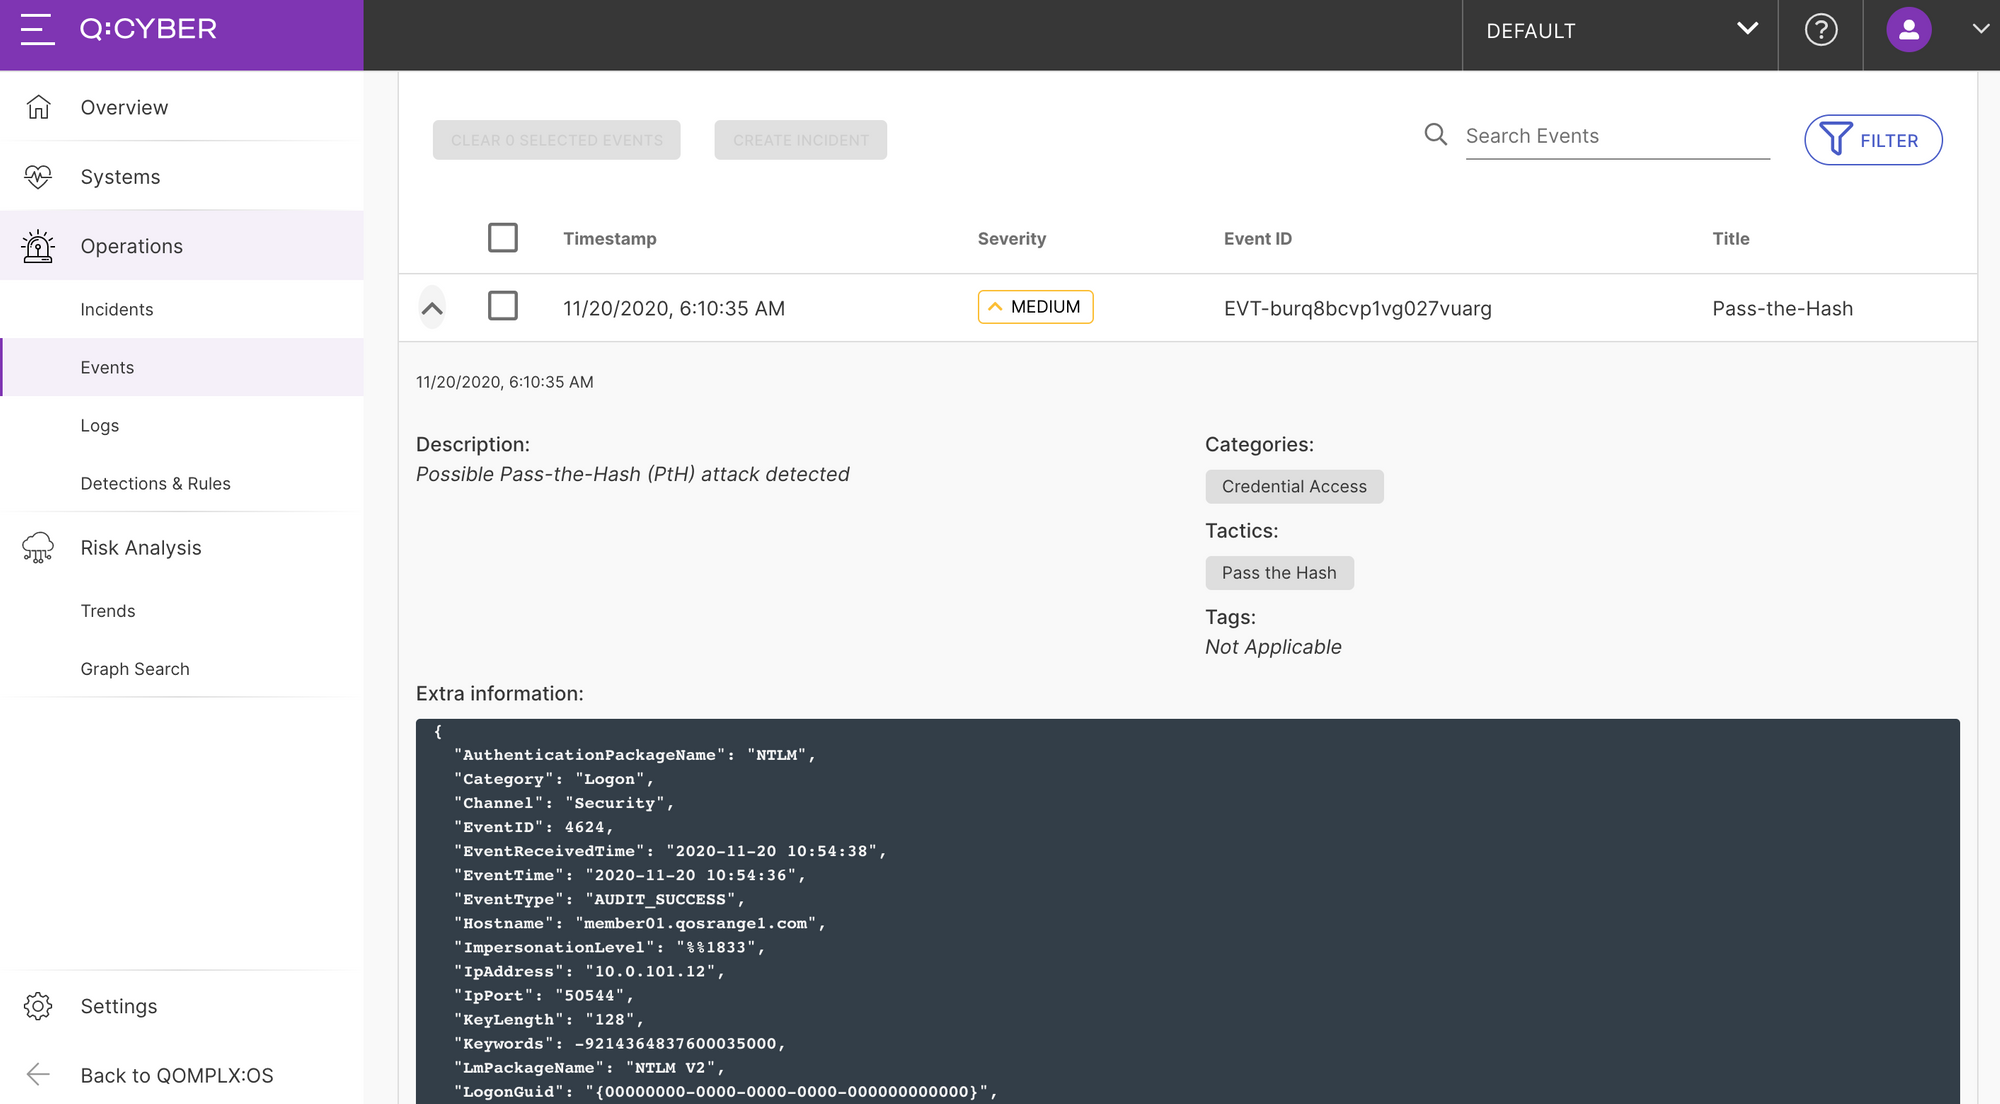
As shown in Figure 11, Q:CYBER will detect the attack and generate the appropriate alerts.
In our next installment, we'll discuss how to use windowed rules for more advanced types of detections.


Interested in learning more?
Subscribe today to stay informed and get regular updates from QOMPLX.